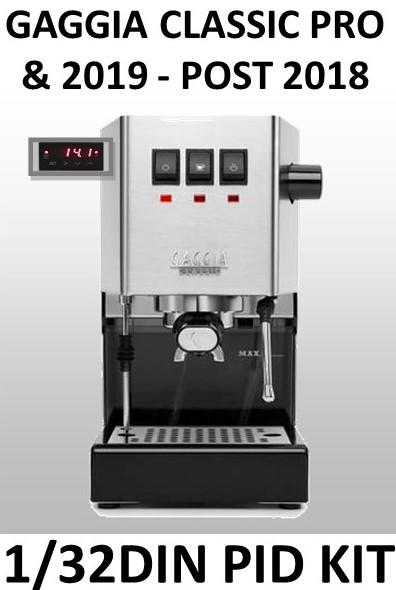
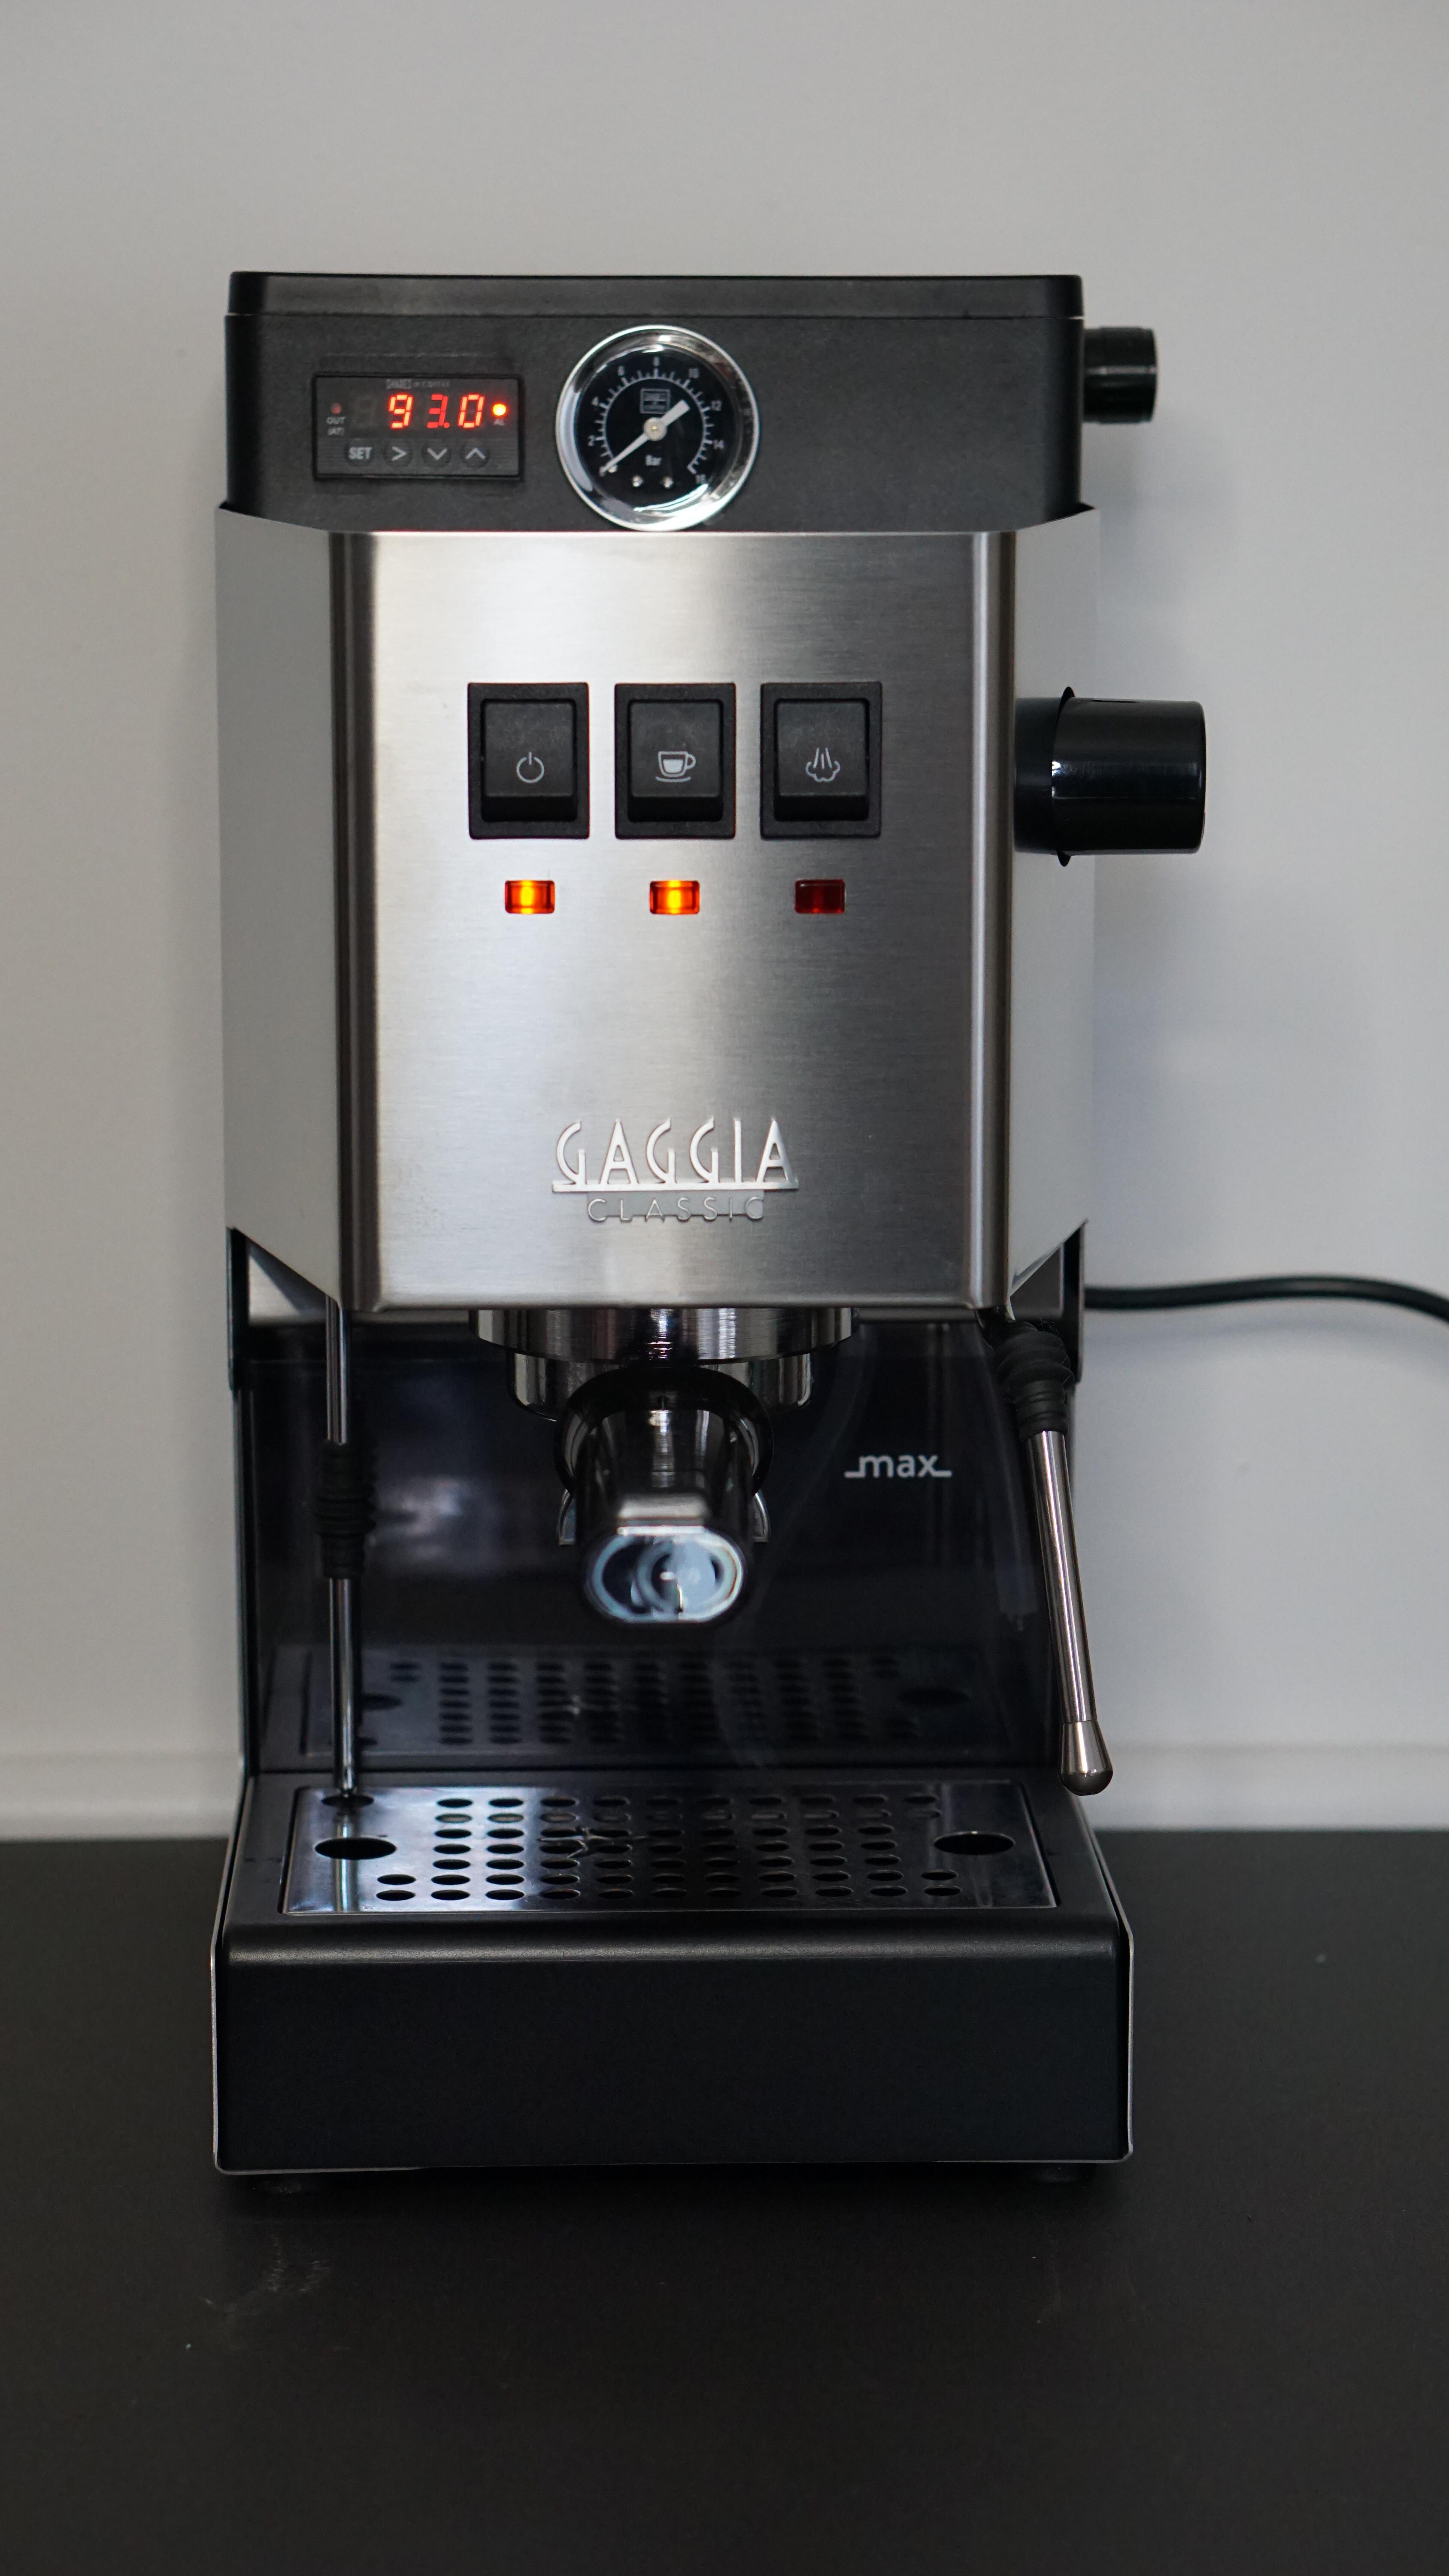
New - Gaggia Classic Pro/2019/Evo 2023 PID kit - 1/32DIN single display
4.9 (420) · € 79.50 · En stock
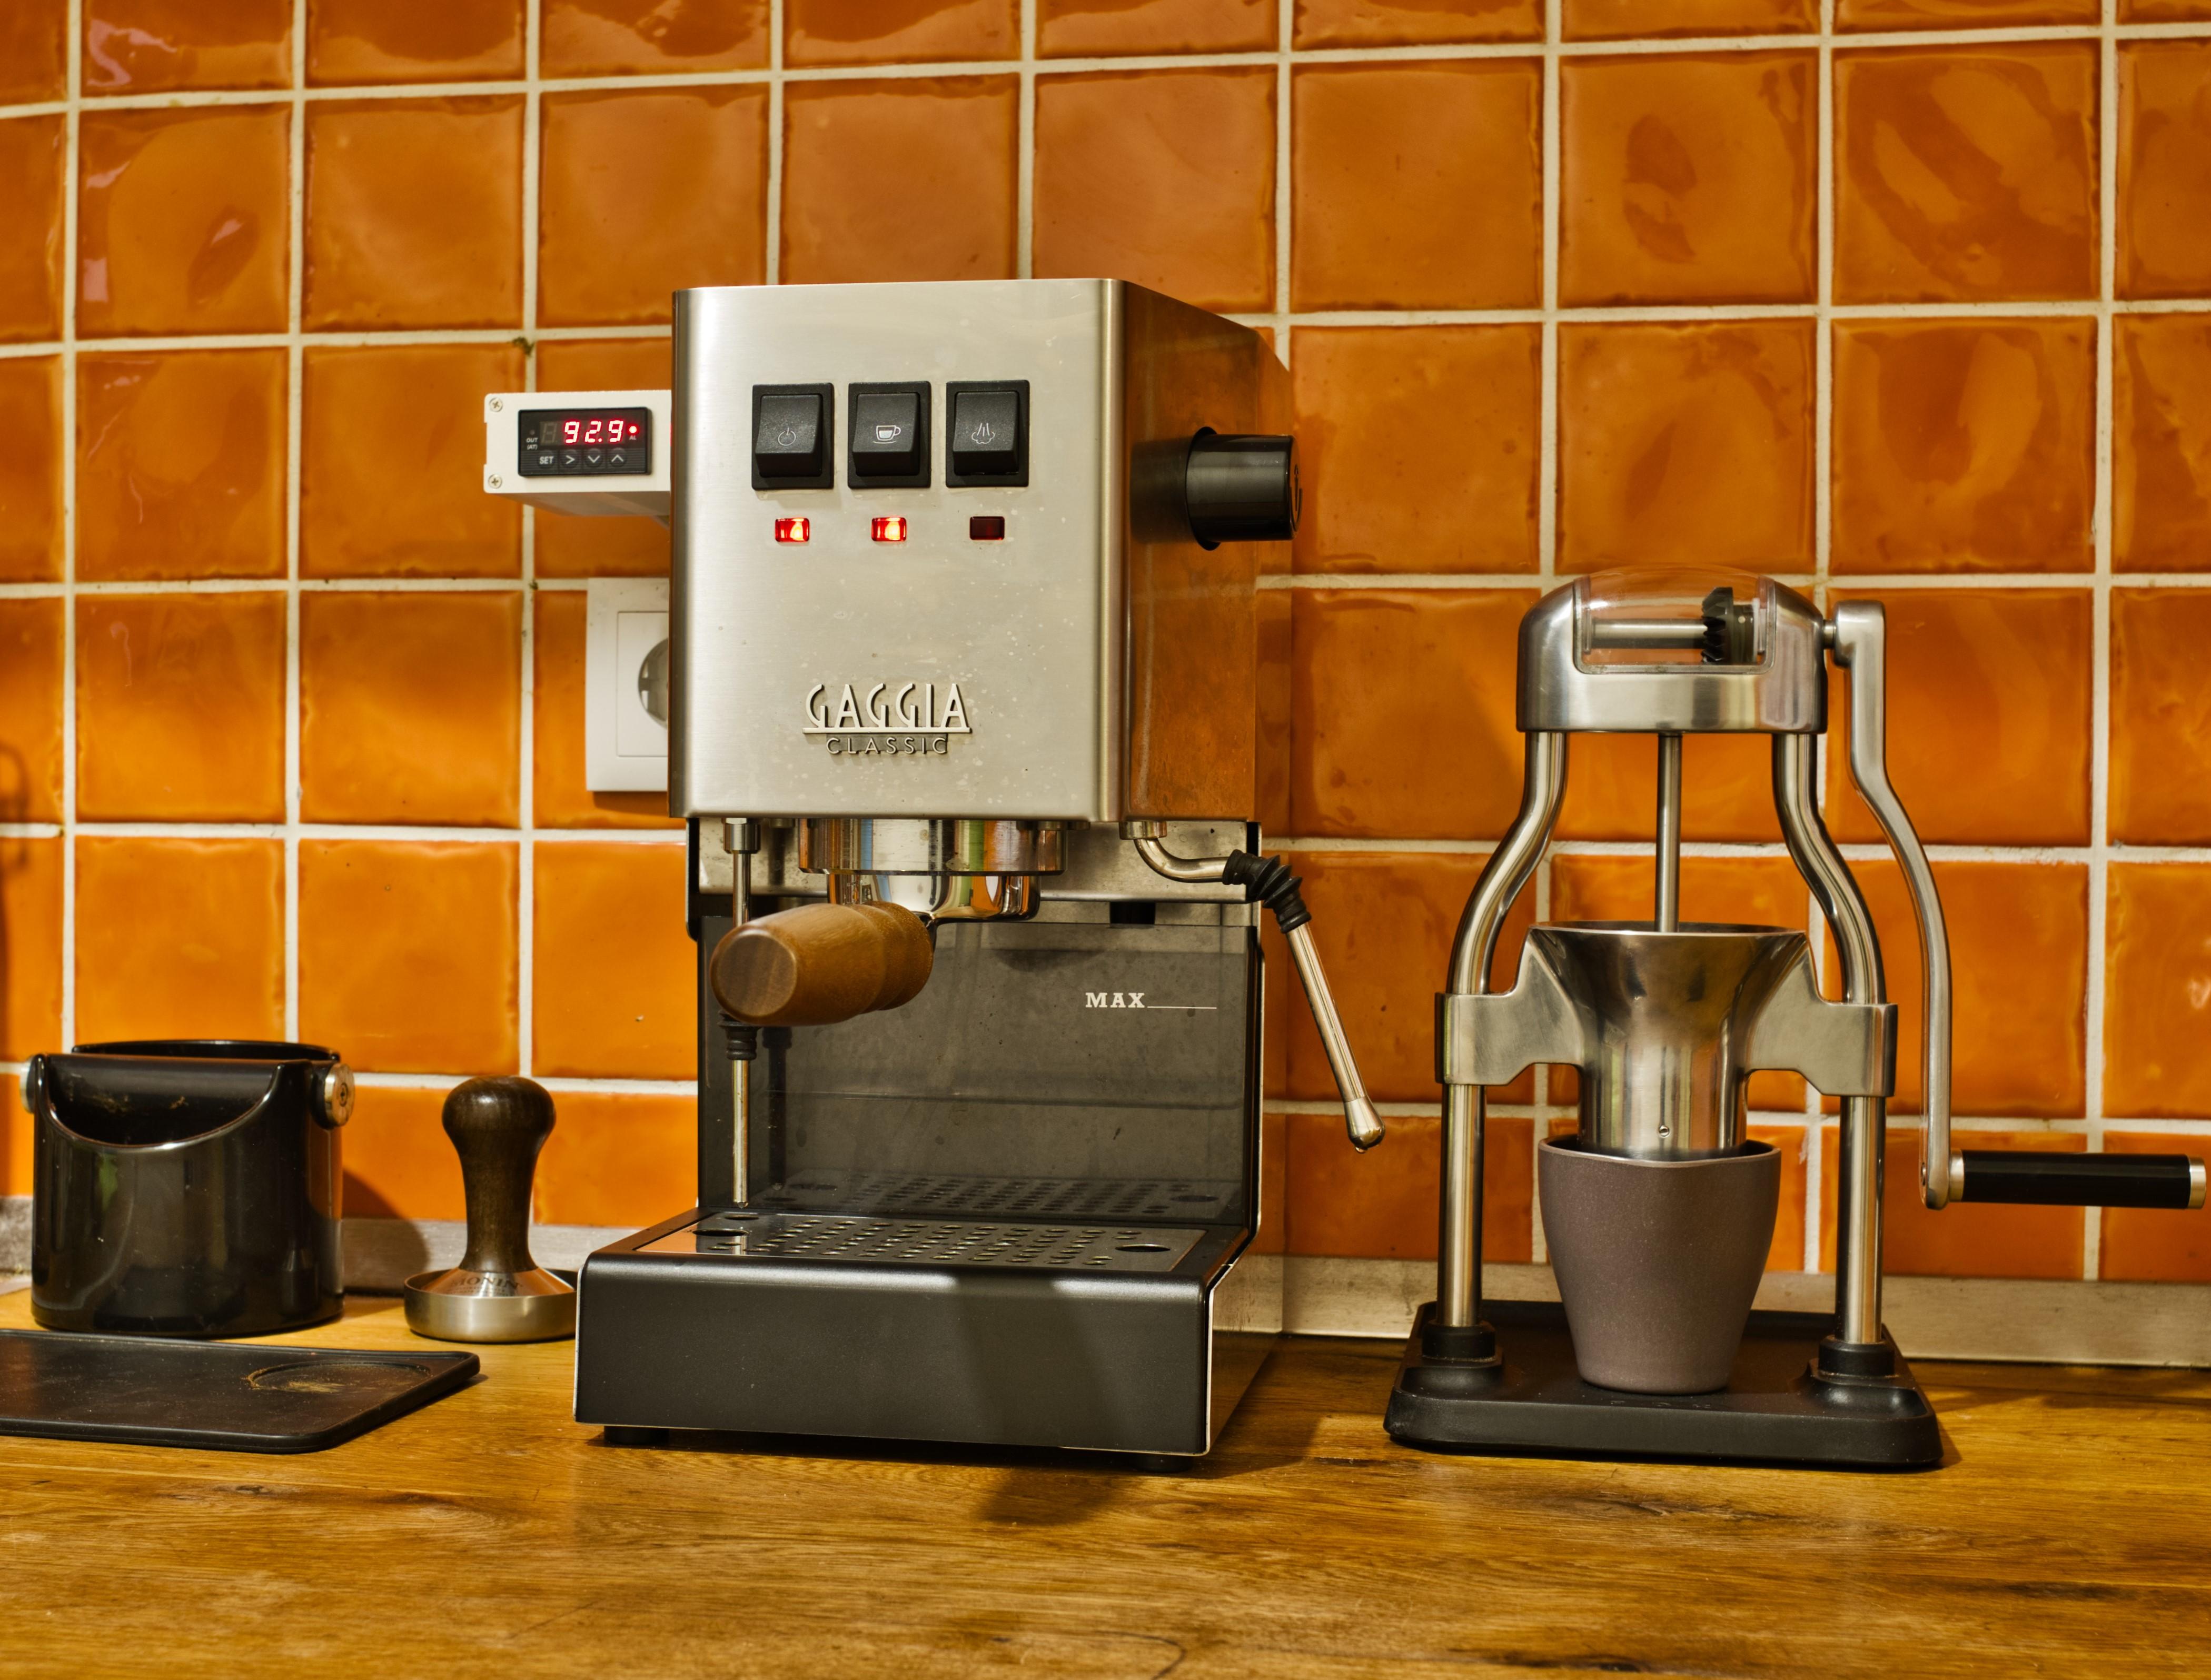
Our PID kits now support the Classic Evo Pro and Classic Evo 2023 - see Variant info below.TopBox PID kits: If you order a TopBox mount (either style) along with our Brew Pressure Gauge within the same order, WHEN TOPBOX STOCK ALLOWS we will ENDEAVOUR to ship a "TopBox (with gauge hole)" regardless of which style TopBox you order. Please contact us via chat if you don't wish for this to happen.PID mod kit, including brew and steam control, with all parts and instructions required to install within your Gaggia Classic Pro/2019 /Evo 2023 machine.This kit is suitable for the new style Gaggia Classic espresso machines made between 2018 and 2023. If you examine the label on the bottom of your machine you should find one of the following model codes:RI9380/?? - 120V, US "Gaggia Classic Pro" (eg RI9380/46 and other RI9380/?? machines)RI9480/?? - 230V, EU "Gaggia Classic 2018/2019" (eg RI9480/11 and other RI9480/?? machines)RI9380/?? - 120V US "Gaggia Classic Evo Pro" from 2023 onwardsRI9481/?? - 230V, EU "Gaggia Classic Evo 2023" from 2023 onwards The manufacture date of these machines is typically during 2018 or later - this date is often also shown on the serial label on the base of the machine in [week no.]/[Year] format (such as 33/2019 - for week 33 of 2019). If you have any of the models shown below (typically manufactured prior to 2018), then you need to select the alternative kit for the original Gaggia ClassicRI8161/??RI9303/??Model: GAGGIA CLASSIC COFFEETYPE: SIN035 (Classic) - but check with us if you don't see an RI number or date also, as the SIN035 can apply to almost all Classics.VARIANTS: RI9380 / RI9481 - Classic Evo 2023 : If you have a Classic Pro Evo or Classic Evo 2023 then please ensure you check whether or not you have individual connectors to each front switch (ie 4 individual white connectors with their own wires), OR you have the new style monobloc connector per switch (one larger white connector with 4 wires going into it). If you have an early Evo 2023 model and it has 4 individual white connectors to each front switch, then please select the Classic 2019 version. See here for more information and images of the different connector types. If in doubt please contact us via chat. If no variant is chosen then we will assume Classic 2019 - so please ensure that if you have a Classic Evo 2023 with monobloc connectors you select the Classic Evo 2023 variant.If in any doubt concerning the variant then be sure to select “Monobloc switch connectors” to receive the additional parts required. If you don’t have Monobloc connectors then you simply won’t use them.We provide a 12 month warranty on all parts within the PID kits, provided that one of our aluminium or TopBox enclosures is used. Use of a 3rd party enclosure will invalidate our warranty.IMPORTANT NOTES: RI9403 - Classic 2015 / Classic V2: Unfortunately none of our PID kits are suitable for the EU Gaggia Classic 2015-2018 model (with stainless steel boiler, and NO solenoid valve / vent tube and the eco timer that automatically powers the machine off after use) - model number RI9403/18 or RI9403/11If you have ANY doubts as to whether your machine is suitable or which kit to purchase, please email a photo of your serial/model label and a photo of the inside of the machine (lid off) to us for confirmation.FunctionsThis PID kit controls BOTH brew temperature and also steam temperature (and hence pressure). The brew temperature is tightly controlled by the PID algorithm, and the steam temperature is controlled in a more basic fashion which is similar to that of the standard thermostat - though as the steam temperature can be adjusted, this will also adjust the steam pressure.PREINFUSION is NOT a function of this PID kit. In our experience, the best way to add variable pressure preinfusion to a Gaggia Classic is through the use of a pump dimmer mod (ideally with a brew pressure gauge). We are aware that other kits include options for preinfusion - though we do not provide similar functionality, as this can easily be replicated by simply turning the brew switch on for 5s, and then off again for a few seconds, and then on again for your main extraction (obviously you can adjust the 5s and pause time periods to vary the preinfusion as much as you wish).How Difficult is it to fit, how long will it take and what tools do I need?We are frequently asked "How complicated is the installation?" - and the only real answer is that if you are competent with basic workshop tools, and can follow written instructions and photographs then you should be able to install it. Installation usually takes most people around 2-3hrs and requires only basic tools such as:A medium flat-bladed screwdriverA medium cross-head screwdriverA 17mm spanner/wrench or adjustable spanner/wrench (or alternatively needle-nosed pliers)A 4mm Allen Key / Hex toolSome scissors or wire cuttersSome rubbing alcohol or multi-surface cleaner, and a clothFor the avoidance of doubt - no soldering is required, no cutting of the case, no cutting of wires - and the entire kit can be deinstalled and the machine reverted back to standard (with no sign of the kit being fitted) should you ever want or need to.I've installed a PID and measured my brew temperature but it seems low
Our PID kits now support the Classic Evo Pro and Classic Evo 2023 - see Variant info below.TopBox PID kits: If you order a TopBox mount (either style) along with our Brew Pressure Gauge within the same order, WHEN TOPBOX STOCK ALLOWS we will ENDEAVOUR to ship a 'TopBox (with gauge hole)' regardless of which style TopBox you order. Please contact us via chat if you don't wish for this to happen.PID mod kit, including brew and steam control, with all parts and instructions required to install within your Gaggia Classic Pro/2019 /Evo 2023 machine.This kit is suitable for the new style Gaggia Classic espresso machines made between 2018 and 2023. If you examine the label on the bottom of your machine you should find one of the following model codes:RI9380/?? - 120V, US 'Gaggia Classic Pro' (eg RI9380/46 and other RI9380/?? machines)RI9480/?? - 230V, EU 'Gaggia Classic 2018/2019' (eg RI9480/11 and other RI9480/?? machines)RI9380/?? - 120V US 'Gaggia Classic Evo Pro' from 2023 onwardsRI9481/?? - 230V, EU 'Gaggia Classic Evo 2023' from 2023 onwards The manufacture date of these machines is typically during 2018 or later - this date is often also shown on the serial label on the base of the machine in [week no.]/[Year] format (such as 33/2019 - for week 33 of 2019). If you have any of the models shown below (typically manufactured prior to 2018), then you need to select the alternative kit for the original Gaggia ClassicRI8161/??RI9303/??Model: GAGGIA CLASSIC COFFEETYPE: SIN035 (Classic) - but check with us if you don't see an RI number or date also, as the SIN035 can apply to almost all Classics.VARIANTS: RI9380 / RI9481 - Classic Evo 2023 : If you have a Classic Pro Evo or Classic Evo 2023 then please ensure you check whether or not you have individual connectors to each front switch (ie 4 individual white connectors with their own wires), OR you have the new style monobloc connector per switch (one larger white connector with 4 wires going into it). If you have an early Evo 2023 model and it has 4 individual white connectors to each front switch, then please select the Classic 2019 version. See here for more information and images of the different connector types. If in doubt please contact us via chat. If no variant is chosen then we will assume Classic 2019 - so please ensure that if you have a Classic Evo 2023 with monobloc connectors you select the Classic Evo 2023 variant.If in any doubt concerning the variant then be sure to select “Monobloc switch connectors” to receive the additional parts required. If you don’t have Monobloc connectors then you simply won’t use them.We provide a 12 month warranty on all parts within the PID kits, provided that one of our aluminium or TopBox enclosures is used. Use of a 3rd party enclosure will invalidate our warranty.IMPORTANT NOTES: RI9403 - Classic 2015 / Classic V2: Unfortunately none of our PID kits are suitable for the EU Gaggia Classic 2015-2018 model (with stainless steel boiler, and NO solenoid valve / vent tube and the eco timer that automatically powers the machine off after use) - model number RI9403/18 or RI9403/11If you have ANY doubts as to whether your machine is suitable or which kit to purchase, please email a photo of your serial/model label and a photo of the inside of the machine (lid off) to us for confirmation.FunctionsThis PID kit controls BOTH brew temperature and also steam temperature (and hence pressure). The brew temperature is tightly controlled by the PID algorithm, and the steam temperature is controlled in a more basic fashion which is similar to that of the standard thermostat - though as the steam temperature can be adjusted, this will also adjust the steam pressure.PREINFUSION is NOT a function of this PID kit. In our experience, the best way to add variable pressure preinfusion to a Gaggia Classic is through the use of a pump dimmer mod (ideally with a brew pressure gauge). We are aware that other kits include options for preinfusion - though we do not provide similar functionality, as this can easily be replicated by simply turning the brew switch on for 5s, and then off again for a few seconds, and then on again for your main extraction (obviously you can adjust the 5s and pause time periods to vary the preinfusion as much as you wish).How Difficult is it to fit, how long will it take and what tools do I need?We are frequently asked 'How complicated is the installation?' - and the only real answer is that if you are competent with basic workshop tools, and can follow written instructions and photographs then you should be able to install it. Installation usually takes most people around 2-3hrs and requires only basic tools such as:A medium flat-bladed screwdriverA medium cross-head screwdriverA 17mm spanner/wrench or adjustable spanner/wrench (or alternatively needle-nosed pliers)A 4mm Allen Key / Hex toolSome scissors or wire cuttersSome rubbing alcohol or multi-surface cleaner, and a clothFor the avoidance of doubt - no soldering is required, no cutting of the case, no cutting of wires - and the entire kit can be deinstalled and the machine reverted back to standard (with no sign of the kit being fitted) should you ever want or need to.I've installed a PID and measured my brew temperature but it seems low

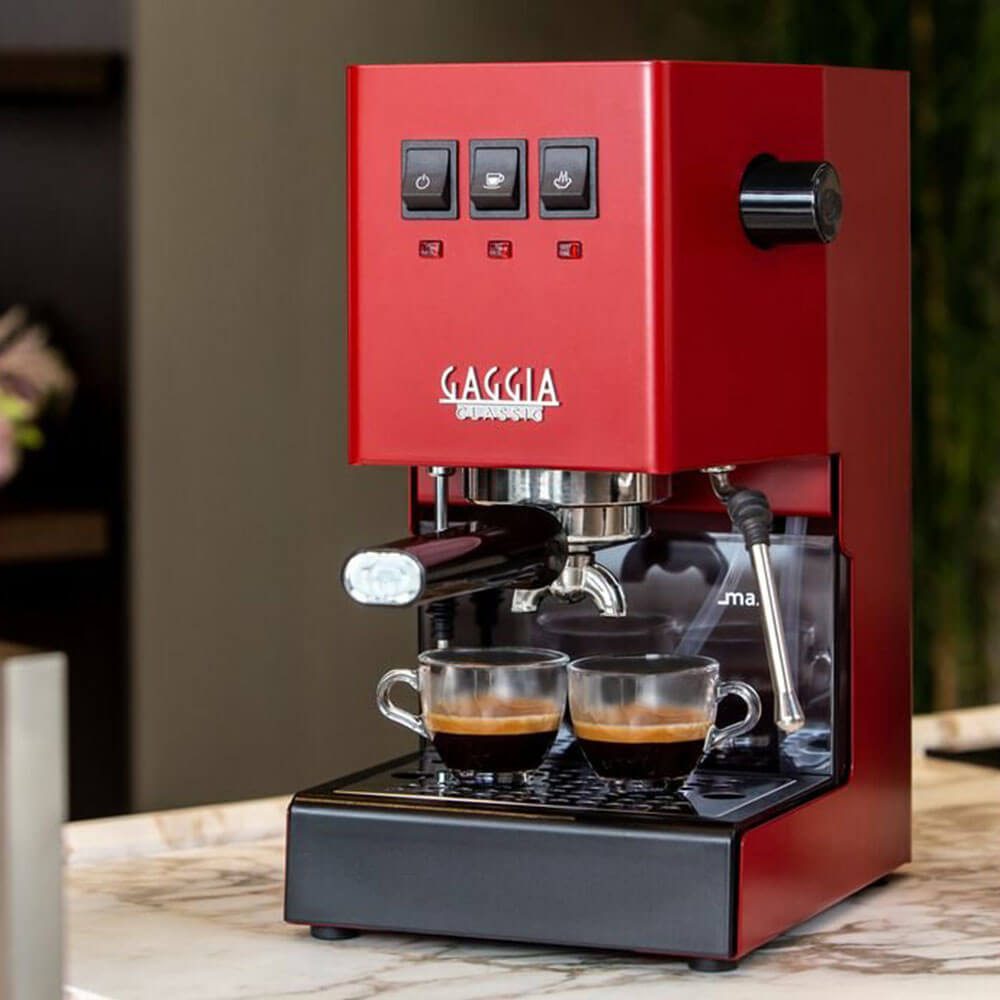
Gaggia Classic Evo Pro 2023 Manual Espresso Coffee Machine, White
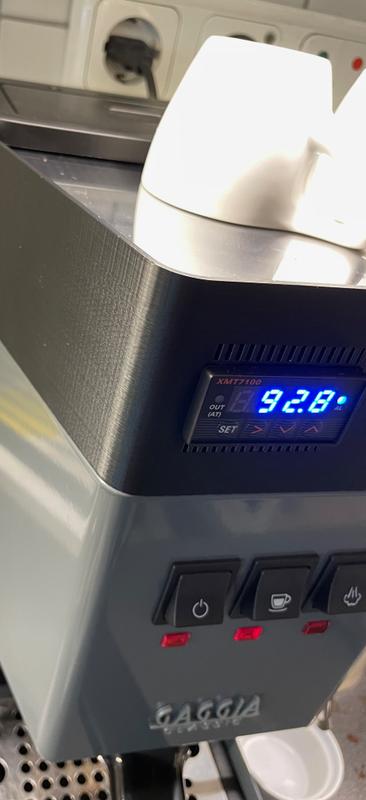
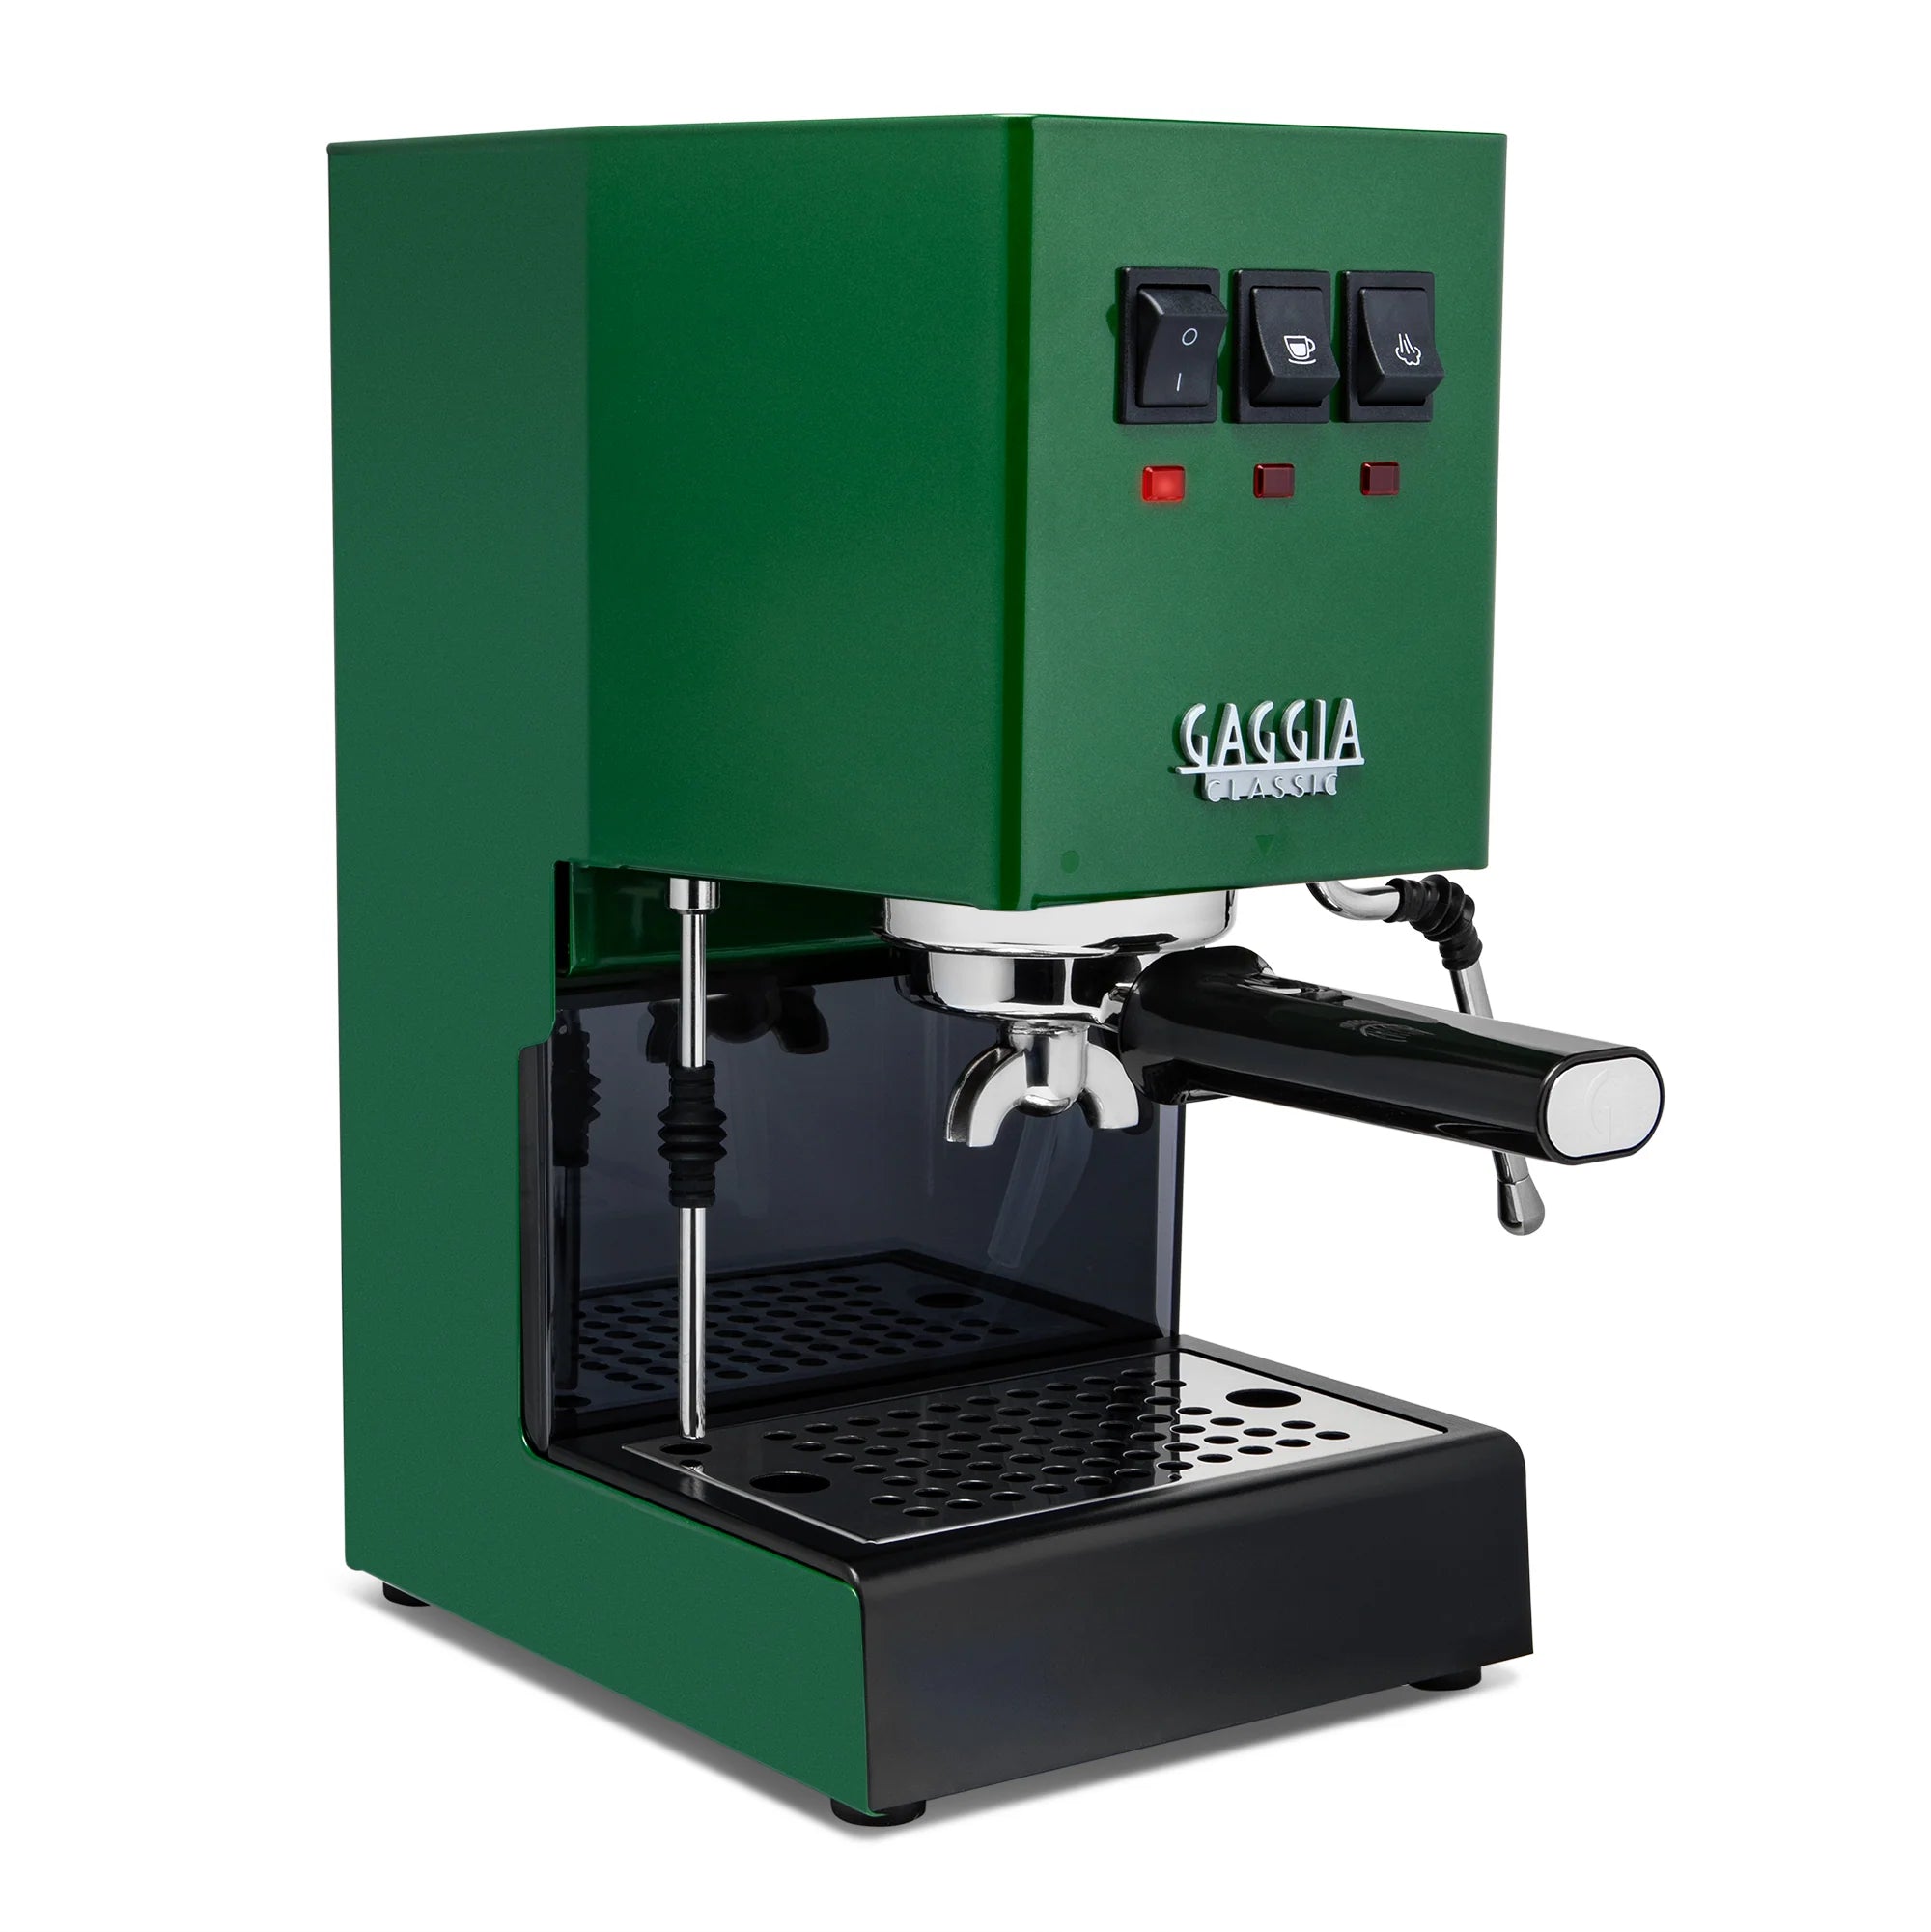
Gaggia Classic Pro / 2019 or Evo 2023 PID full kit
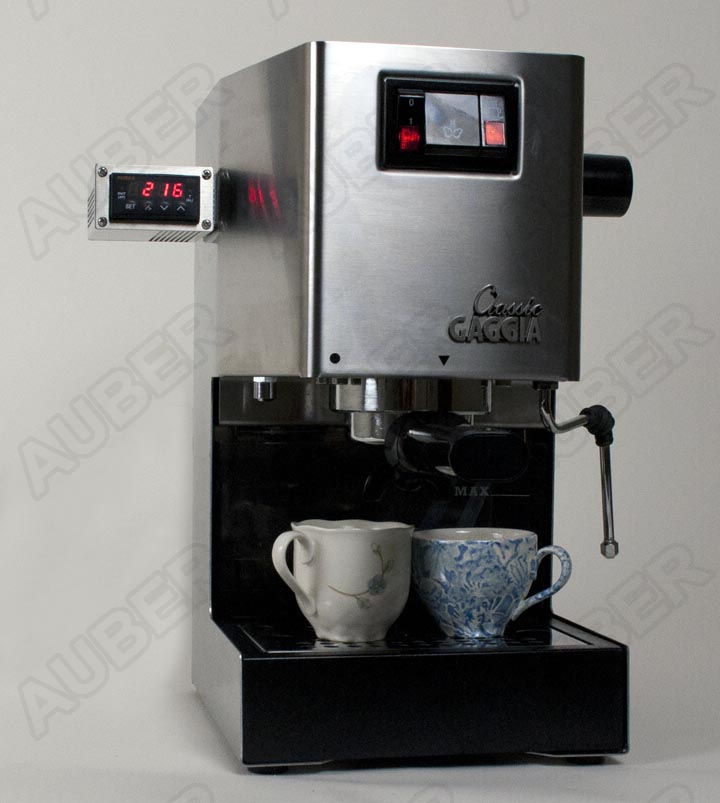
PID Retrofit KIT for Gaggia Classic Pro & Classic & Home PID Temperature Control Retrofit KIT for Rancilio Silvia Espresso Machine [KIT-GG] - $149.50 : Auber Instruments, Inc., Temperature control solutions for

New - Gaggia Classic Pro/2019/Evo 2023 PID kit - 1/32DIN single display

Gaggia Classic Evo Pro 2023 Manual Espresso Coffee Machine, Red
Gaggia Classic Evo Pro » CoffeeGeek
New - Gaggia Classic Pro/2019/Evo 2023 PID kit - 1/32DIN single display

Gaggia Classic Pro PID Upgrade Kit for Brew, Steam, & Flow Control – Sungaze Coffee
Modified Gaggia Classic Pro Evo w/ Upgrade Kit for Brew, Steam, & Flow Control + 2
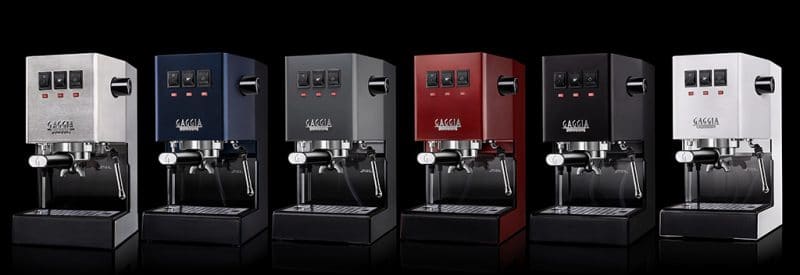
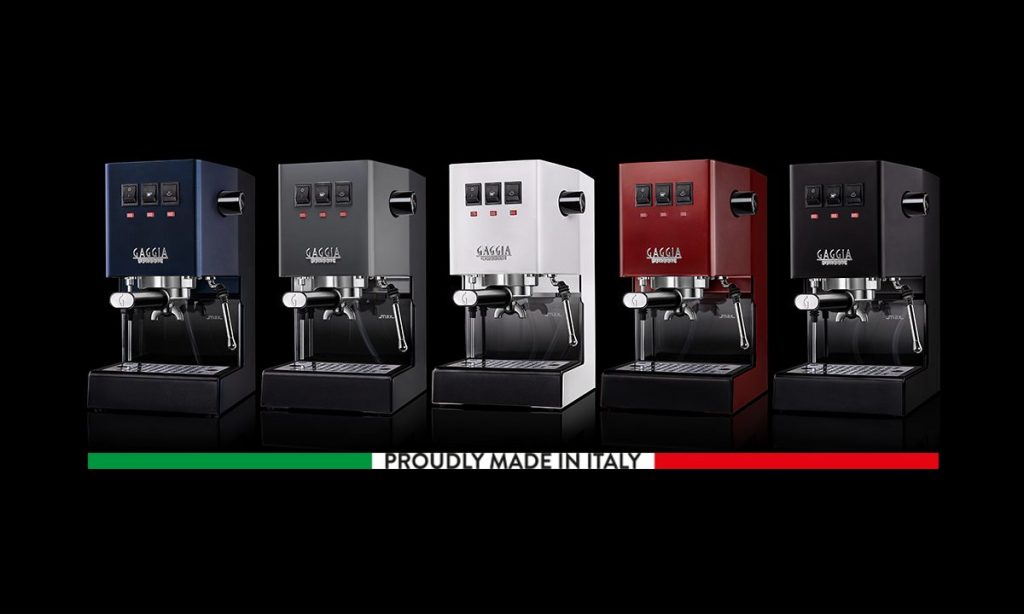
Gaggia Classic Pro EVO 2023 customised with PID, Gauge, Dimmer & 9 Bar Pressure Spring (All colours available)

Sungaze Coffee Gaggia Classic Pro PID Kit for Brewing & Steaming - Achieve $2000-$3000 Quality Shots - Pro-Level Espresso Upgrade Kit for Gaggia Classic and Evo Pro - Elevate Your Gaggia

Gaggia Classic Pro EVO 2023 customised with PID, Gauge, Dimmer & 9 Bar Pressure Spring (All colours available)
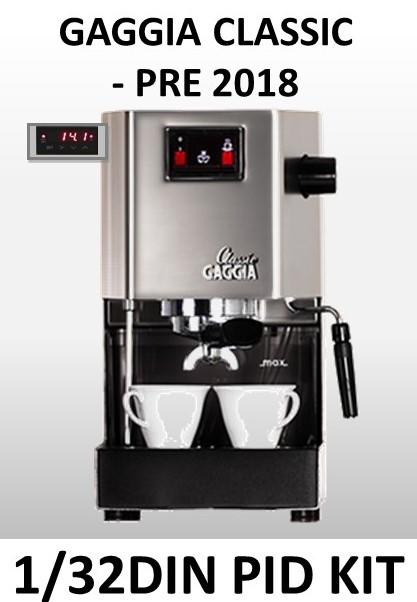
Original - Gaggia Classic PID kit - 1/32DIN single display

Gaggia Classic Pro Brew & Steam PID Kit Upgrade with Flow Control, Pro-Level Espresso Upgrade Kit, Gaggia Classic Evo Pro - Kit Only, Machine Not Included

Gaggia Classic Pro - EVO Orange - Online Coffee Shop